The best way to keep your Mac in perfect condition is to update the system software periodically, back up the system and perform certain maintenance tasks regularly.
Tips To Keep The Mac In Perfect Condition
1.Keep things updated
From the Apple menu, choose Software Update (the Mac must be connected to the Internet). The Software Update option will search for new versions of Apple software. If you find them, it will show them in the Software Update window. Click on the Install button to download and install the software.
2.Organize and name the files
Organize the files so you can easily access them. This can prevent you from deleting them by mistake and will facilitate your location. You can organize yourself by creating new folders (in the Finder, press Shift-Command-N) and organizing them in a practical hierarchy for your files, or be moving the files to existing folders. If you lose track of a file or folder, you can use Spotlight to find the file or folder quickly.
Tip: Review the files and folders that have generic names and give them a more descriptive name so that you find it faster to find what you want. This can help you stay organized and make searches in Spotlight easier, especially if you’re looking for a file in a collection of digital photos with names like “DSC_0431.jpg”.
Note: If you use iPhoto to manage your photos, do not use the Finder to change the names of the photo files.
Note: This tip does not apply to applications in the Applications folder, such as Mail, iTunes, Safari, etc. You will avoid problems if you leave the applications in the Applications folder without changing their names. You can drag an application to the Dock if you want to open it quickly and easily from the Dock.
3.Perform Regular Backups
In the event that you accidentally lose files or need to restore the entire system from a backup, you should back up your computer regularly. You can use Time Machine in Mac OS X v10.5 and later, which offers a simple way to back up and restore files to and from a different disk. In addition, you can also make backup copies to a CD, a DVD, an external hard drive, an iDisk or another storage device.
4.Archive files of little use in case of requiring disk space
You can free up disk space using free software Advanced SystemCare this will archive large files and use them rarely (learn how to do it in: Compress and unzip files and folders). Be sure to name the resulting file as appropriate, so that it is easy to identify. You can remove unnecessary or outdated personal files and any material that you no longer want or need. Simply drag these items to the Trash and empty it.
5.Clean the Mac
To make your Mac faster and remove unwanted and junk files which slow down your Mac performance install the MacBooster free download on your Mac. This will completely clean your Mac and keep it fresh.
As we discussed in a week ago’s Working Mac, you may have been persuaded that you don’t need to stress over PC infections on your Mac. Furthermore, to some degree, there’s the fact to that. While your Mac can be tainted with malware, Apple’s worked in malware identification and record isolate capacities are intended to make it more improbable that you’ll download and run vindictive programming.
Apple acquainted malware discovery with the Mac OS with Snow Leopard (Mac OS 10.6). This framework comprises of the isolate of any application downloaded from the Internet, the utilization of Code Signing declarations to confirm that an application is originating from a genuine source, and general security refreshes that incorporate databases of known malware focusing on the Mac OS.
As a result of this framework, called File Quarantine and every so often alluded to as XProtect:
Applications in isolate show a discourse window reminding you where the application originated from and asking regardless of whether you’re certain you need to open it.
Applications with no code marking endorsement, contingent upon your Gatekeeper settings, may show a message saying the application can’t be opened in view of your settings. (For programming you know is great you can sidestep this by control-tapping the application and choosing Open from the subsequent relevant menu.)
Applications that are known malware can’t be opened by any stretch of the imagination. You’ll be met with a message offering the alternative to hurl the application in the waste.
Also, this is the reason Macs remain for the most part infection and malware free.
To ensure your Mac malware database is dependably a la mode you’ll need to confirm that your Mac dependably naturally introduces security refreshes and related framework information documents.
Open System Preferences
Open the App Store inclination
Ensure that Automatically check for updates and Install framework information documents and security refreshes are checked.
This should keep your Mac free from most noxious programming, despite the fact that note that it doesn’t make it unimaginable for vindictive programming to be introduced on your Mac. There is no product that is ready to discover everything. On the off chance that new malware is discharged today and you download and run it today you will have done as such before Apple’s databases could have been refreshed. So it’s constantly best to be insightful while downloading programming from obscure sources.
While it’s improbable that your Mac will run any malware, there is potentially a more malignant issue: You Mac could turn into the Typhoid Mary Windows infections, which is to state, you could harbor infections on your Mac that won’t impact you, however, can be issued for Windows clients.
Believe I’m clowning? Observe this screenshot, taken from my Mac over the span of composing this segment:
That, my companions, is a rundown of 30 possibly terrible things that…you got it, were found on my Mac while I was running a test infection check, one of which is a Windows infection. What’s more, nope, I didn’t design this, despite the fact that I planned to expound on this issue.
Mac OS Sierra is a fantastic update arriving from Apple to make us love our Macs even more. It has plenty of new features, and also has the same easy clean install and upgrade flow as did the previous OS.
Note, that getting an upgrade is the easiest way of installing the new Mac OS. It saves all your personal files, apps and user data, while a so-called clean install of Sierra will erase all data on the startup drive and replace it with a clean copy of OS. But, if you like an idea of giving your Mac a fresh start with a new Mac OS and nothing else, a clean install is the right option for you.
And when your Mac is fresh and clean, then you need advanced security for your fresh Mac. You can get more security for your Mac by downloading this software free here. This will really helpful and protect your Mac from Threats, Malware, and Trojans.
Also, in case you’ve noticed that with time your Mac is running slower, it has unusual startup or shutdown issues and crashes, a clean install may be a good way to get back the speed and fix the problem.
First of all, make sure that your Mac is able to run Mac OS Sierra.
Then, you should prepare your Mac for the installation:
Download macOS Sierra Installer from the Mac App Store. Once the download completes, it will automatically launch. Quit macOS Sierra Installer app without performing the installation.
Take a 16GB or larger USB flash drive to create a bootable Sierra installer. This flash drive is only needed for a clean install on your Mac’s startup drive. But if you plan to clean install on a non-startup drive (you have and extra HDD or SSD on your Mac), you don’t need the USB.
Backup your Mac to ensure your personal data is intact.
Clean Install mac OS Sierra on Your Mac’s Startup Drive
If you’re going to perform a clean install on the startup drive, you need to backup your data, create a bootable copy of the installer, and, finally, boot from the bootable installer. So, let us begin.
Step 1: Clean up your Mac
To make sure Sierra has no troubles installing and works fine after, you need to get rid of system junk on your Mac first. You could clean it up manually, but using a cleaning app like CleanMyMac 3 will save you hours on that. Junk removal with CleanMyMac takes only a few minutes. Download CleanMyMac 3.9.2 for free, launch it, click Scan, and then Clean. Now you’ve got plenty of free space and your Mac is free from system trash.
Step 2: Back up your data
Note: A clean install of macOS Sierra on the startup drive completely erases all data on that drive: all your files and documents, including music, movies, pictures, and even apps.
So, If you skip this step, you wouldn’t be able to recover your data if something goes wrong.
To backup your Mac:
Open Time Machine.
Click Select Disk.
Choose where you wish to save your files (to the external drive or to the cloud storage).
Click On to turn Time Machine on.
Click on the “arrow clock” icon and select Back Up Now in the menu bar at the top of the screen.
Step 3: Clean Install macOS Sierra on your startup disk
Create a bootable flash drive with macOS Sierra.
First, make sure your USB flash drive is formatted and named as “Untitled”.
To format a USB drive launch Disk Utility (Finder -> /Applications/Utilities/Disk Utility).
Select your USB drive under External.
Click the Erase tab at the top of the Disk Utility window. Select Mac OS Extended (Journaled) from the format list. Then, click the Erase button. When the process is complete, click Done, and close the Disk Utility window.
If your drive is named something else, you need to rename it (Open Finder -> right click on the USB drive and choose Rename).
Terminal will ask you for an admin password (the one you use to log in). It won’t display characters when you type, so just do it. Hit Return. You’ll see that Terminal erases your drive. Then, Terminal will copy the installer file to your disk. This will take a few minutes. When the process is complete, the Terminal window will report “Done.” You can quit Terminal and your bootable macOS Sierra installer USB drive is ready for use.
Also, you can follow the instructions from an Apple article on how to create bootable installer.
Plug in the bootable macOS Sierra installer USB drive to your Mac.
Restart your Mac while holding the Option key or Cmd+R. Make sure to keep it pressed!
When Mac restarts, you’ll see the macOS Startup Manager with a list of bootable devices that your Mac can start up from.
Use the arrow keys to choose your USB drive with macOS Sierra installer. Press Enter.
Select Disk Utility.
In the window, at the top of the left bar, select your Mac’s Main Drive (it looks like a MacintoshHD).
Select the Erase tab located next to the First Aid button at the top.
Near the center of the window, select the Format drop-down list and select Mac OS X Extended (Journaled) type.
Click Erase (Note: this will erase all your data from your main drive!) and give the drive some time to format.
When it’s done, close Disk Utility and select “Install macOS” from the menu.
Select your main drive and install the new macOS Sierra 10.12.
Follow these Sierra install instructions and enjoy your newly clean-installed macOS Sierra.
Clean Install on a Non-Startup Drive
This type of clean install doesn’t require you to make a bootable copy of the macOS installer, since you can run the installer directly from your Mac’s startup drive. But you need to have another hard drive or volume that you can use for installing macOS.
So, this is the easiest way to clean install macOS 10.12. Simply use an extra drive or volume (it doesn’t have to necessarily be empty already, you just need to be fine with it being erased) and install Sierra there.
Step 1: Erase your non-startup drive
If your non-startup drive has any other Mac OS, erase it before installing Sierra. If the target drive only has personal data on it, or is already empty, you can skip the erase process.
To erase the non-startup drive, use a Mac’s Drive Using Disk Utility (OS X El Capitan or later)
After the non-startup drive is erased, you can start the install process.
Step 2: Download the macOS Sierra Installer from the Mac App Store
When the macOS download completes, it will automatically launch the installer. Quit the macOS Sierra Installer app without performing the installation. You’ll find the macOS Sierra Installer in the /Applications folder.
Step 3: Start the Installation of macOS Sierra on the Non-startup drive
Launch the Installer from /Applications folder.
Click Continue.
Check the non-startup drive that you can install Sierra on (usually, the installer will display the default target for the installation of macOS Sierra as the startup drive (Macintosh HD). So, you should to click the Show All Disks button, and the installer will display a list of all attached volumes).
Click the Install button.
The macOS Sierra installer will display a progress bar. You’ll be guided through the macOS Sierra setup process to create a user account, set up date and time, and other introductory stuff.
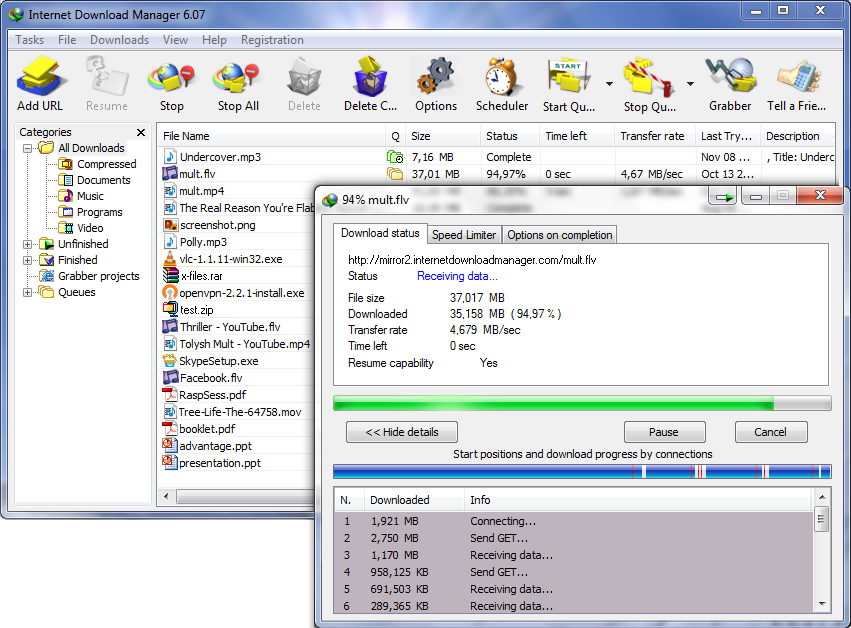
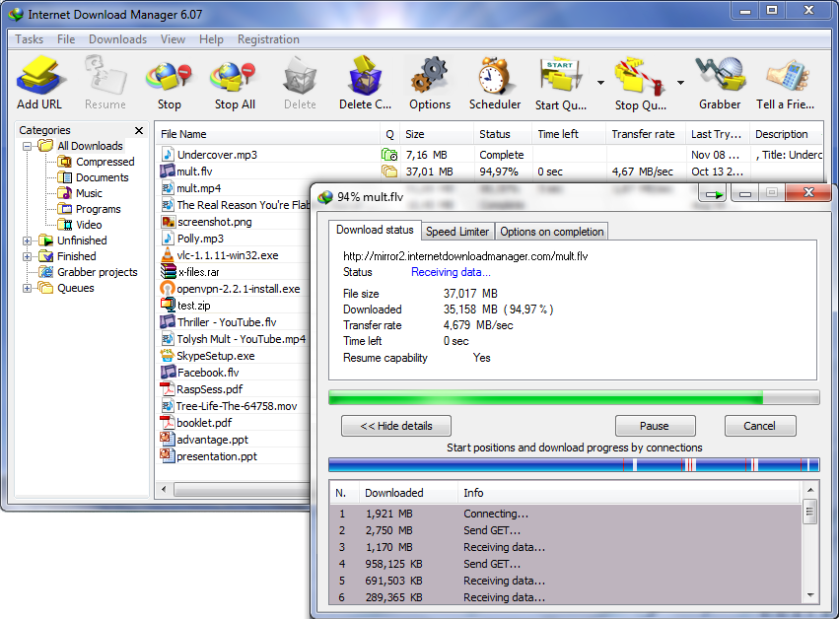
With the Internet Download Manager, downloads of files from the Internet can be significantly accelerated and also more convenient. Whenever you want to download a file from the Internet, simply click on it in the browser as usual or copy the link via the clipboard to the Internet Download Manager.
The Internet Download Manager makes the download of the file at the same time over several connections (streams) to the server and ensures that you can download the file in the ideal case with the maximum speed of your Internet connection. Invisible to you, the download manager divides the file into several segments, partially downloads them, and then reassembles them.
If your Internet connection is interrupted, or you have to interrupt a download yourself, you can simply resume it later and do not have to download the whole file again.
At the same time, you can also use the Internet Download Manager to manage your downloads. To do this, you can sort the downloads into different categories during the download, and you can even check the files for updates.
With the new version, you can now easily download FLV files embedded in web pages. This video format is used by many video platforms such as YouTube, MySpace and more.
Internet Download Manager – an excellent manager to organize the downloads of files of different types and sizes. The main features of the software are the comprehensive review of the downloaded files, the resume of interrupted downloads, tasks schedule, etc.
Internet Download Manager is integrated in most popular browsers, which provides an automatic interception of the downloads. The software includes a built-in module, which uses a special technology to speed up the download. Also Internet download manager allows to download files from the popular services YouTube and Google Videos.
Make your homework much easier and your writing much richer. I have compiled in this article a long list of tools that I hope you get bored and, above all, that serve you to write faster, better, concentrate on writing, etc …
Take note:
1. Programs for writers: Scrivener and others
Many of you already know: there are specific programs that can help us a lot in the task of writing.such as article rewriter tool click here to check. They have a word processor of course, but they organize the writing for independent chapters, have specific sections to order and work your characters, to organize the setting or documentation … and other resources as word counter or can even detect if you repeat some too many times.
A myriad of options, all useful for writers (especially novel).
Scrivener (includes Spanish version). 30 days trial + € 38
Plume creator or Ywriter: free, but simpler and in English.
Miscellaneous Programs
2. Evernote and notebooks
What would become of us without the notebooks? Perfect to point ideas that, if not, we could forget. Remember that it is good to have one next to the bed, because just before we go to sleep we have great ideas: it is scientifically proven. Here I wrote a post about the notebooks, that’s how indispensable they are.
But in this digital age, it’s good to also have a virtual tool. EVERNOTE: is a very simple and intuitive program to create and organize annotations, and also installs on all your devices (mobile, laptop, computer, tablet …) and as soon as you write something in one of them, you automatically have it available also in the others, since it saves your notes in “the cloud”.Also, you can never lose them. Great, right?
3. Plot Organizers and Subframes
If you’ve already started writing novels, scripts, or drama, you’ll have noticed that you need a step more in writing than when you write stories (or short films): work the structure. It is difficult to get out of a writing of more than 100 pages without a minimal outline of what is going to happen.
You can do it at home with paper and pen, of course, but fortunately, there are already programs and apps to do online, with which you can add new events or frames or change site events.
I leave you three options.
Cacoo: It is an online application (you do not have to download anything) and free to create schemes. You have already prepared templates – and although none of it is
exactly of novel you can make an accessory to him.
Writer’s cafe (in the image): one of the computer programs I talked about above has
a perfect and very intuitive plot organizer. € 20
Scapple program: only to organize notes in schemes. From the same company as Scrivener, it is probably the reason why this program has no plot organizer (only notes are organized and not very practical). Integrates with Scrivener. € 15
By the way, remember that in this other post I explain how to carry out several subplots in your novel without losing or losing the reader. It never hurts ;-).
One of the greatest challenges when writing – you know it well – is to find the time to do it and, once started, not to distract and continue writing until we finish our chapter, our story or the time that we had marked. But of course, while you can ring the phone, wassap, or you can happen to watch facebook, instagram, twitter, etc … herramientas04
All those distractions break your “flow” and do not allow you to get into the writing. Here you have several applications that isolate your computer or tablet from the internet and allow you to write concentrated. (Of course, the mobile must be silenced manually 😉)
4. Utilities to concentrate writing (1): Disconnecting from the internet
OmmWriter: The more hipster and zen. A nice and elegant application for
computers and tablets. It costs 3 €.
Write Room: For Mac users only. € 10.
Focuswriter: It looks like it’s free (in principle). Also the simplest, yes.
5. Utilities to concentrate writing (2): Music and background sounds.
Another very good option to concentrate – if disconnecting from the Internet you are not interested – is to create a sound barrier that isolates you from the real world and helps you to imbibe in your world of fiction. This can be created through ambient sounds or music. And, of course, if you can afford a getaway to a house in a forest or by the sea … honey on flakes: natural sounds.
Of course, mute the phone is still essential 😉
tools05A soft Murmur: you can mix sound of rain, waves, fire of chimney … in the
proportion that you want. All natural sounds. Another similar one is Noisly, that has sent me Arantxa Rufo.
Coffitivity: In case you fancy the murmur of people talking, in a cafeteria or in a
university, extracted from real places.
Spotify: Of course, music is always a great choice.
We all are well aware of the endless capabilities of AVG cleaner. It has been serving us since so long and all the users are quite satisfied with its features and updated versions. Here we are talking about a utility that supports the functionality of AVG. AVG TuneUp speeds up, cleans, and boosts the battery life of your device.
AVG TuneUp includes AVG cleaner for Android and Mac. All your Android devices; given your phones and tablets can be protected with the use of this application. There is no restriction related o the downloading of the program, you can download it as many times as you want on your different devices.
Here are the key features of AVG TuneUp. All of these characteristics can be found in the latest version of the program.
The program has the capability to prioritize the processes for optimum performance. AVG TuneUp will analyze the usage and need of repair of every program in your device on its own. It will then work on each of them one by one.
The program speeds up the cleaning process, so your computer or whatever device on which you are using the application; work smartly and efficiently.
The application is programmed in such a way that it analyzes the unused programs and deactivates them. This is done in order to protect your phone from slowing down.
The battery of your device is what keeps it running, so AVG TuneUp ensures an extended battery life.
The program is built to auto update the cleaning algorithms. This makes it efficient and up to date with the latest amendments by the designers.
The latest version of the application has the capacity to clean over 200 PC programs.
Continuous updates in the program are a proof that is it compatible with almost all versions of Windows.
The duplicate finder tool of the program is much improved in the latest version. It helps you find all the hidden duplicate files within a few seconds.
You PC, Android or Mac device is going to be healthier with AVG TuneUp. It will fix up all the problems in time and you won’t face any difficulty getting full advantage of your device.
An added feature is the Remote PC Cleaning. By using this feature of the program, you can clean up all the connected PC’s from any other PC or Android device.
You can get rid of the hidden clutter from your phone or Mac devices.
There is nothing you will not love about the program. Each feature has its benefits and perks which make this program an essential application for your PC, Android and Mac devices.
Verdict
You can download this amazing application from the official website. One thing is for sure, that your computing experience is going to be a great ride with AVG TuneUp 2017 version. If you want to ensure a healthy and efficient system, then get your application today.
CCleaner is one of the best registry cleaners and computer connection available these days. This review will give you all the information about cleaning your computer and registry and use CCleaner to help speed up your computer and registry. Cleaning your computer with CCleaner is easy to do, and something that every computer user should do.
But before we get too far, let’s start at the beginning and see what a computer and Registry Cleaner is for those who might be uncertain.
What is a registry cleaner and PC?
A registry cleaner is a computer program that automatically cleans and removes unused or incorrect registry entries in the Windows registry. Registry cleaners do not fix the Windows registry but remove old and unused entries for things such as file extensions, ActiveX controls, fonts and many others.
A clean computer simply goes through and removes temporary files, redundant files, and empty the trash. It also cleans a number of temporary files and caches the Internet browser, such as Chrome, Firefox, and IE to speed up.
Basically, registry cleaners and computer help are happier, eliminating unnecessary files.
What is CCleaner and what does it do?
CCleaner offers two services in one (in fact, it offers several services, but we will go in just two). It provides both cleaning the registry and cleaning your computer in an easy-to-use program.
What this means to you: It means, you can clean your computer’s junk files and clean your registry in just a few clicks!
CCleaner also helps optimize the system which allows it to run better and faster. And CCleaner frees up space on the hard drive – sometimes a lot ‘! In my experience, CCleaner gave me 4 gigabytes of disk space that was filled with temporary files and other junk. (Interestingly, much of this had to be declared in Google Earth)
Cleaning your Internet browser
What CCleaner will clean your computer:
Here is a list of some of the programs and files CCleaner will clean your computer.
Internet Browser and Files:
Browsers supported: Google Chrome, Internet Explorer, Firefox, Safari and Opera and many others
Clean files: temporary files, history, cookies, super cookies, download history, form history and other specific files.
Windows files clean:
Recycle Bin, Recent Documents, Temporary Files, Files, Clipboard, DNS Cache, Error Reports, Log Memory Dumps and Jump Lists.
Third-party applications and programs:
CCleaner cleans and removes unnecessary files from many programs like Microsoft Office and Google Earth.
Windows Registry:
CCleaner removes old and used registry features, such as file extensions, invalid shortcuts, icons, and fonts.
Is CCleaner safe?
This is an important question because there are some registry cleaners that claim to offer free registry clean up but actually, damage your computer. These registry cleaning programs are difficult to remove and can also put viruses on your computer.
To avoid this, download only those programs that you have trusted and have read favorable reviews, such as CCleaner!
(Note: if you want another opinion of good reputation, visit the CNET review of CCleaner’s page background, but after reading it!)
CCleaner has existed for many years and comes from a serious, piriform company. CCleaner also creates a backup of your computer every time you clean your registry computer to make sure you do not lose anything that would be important.
CCleaner is safe for your computer, and it also helps you work better with more disk space available to you.
Using CCleaner – How to Speed Up Your Computer
One of the great aspects of CCleaner is that it is easy to use for anyone, even people with little computer experience. The basic steps are downloadable from the internet, analyze your PC, and then run it! Before you know it, the computer will work better and faster.
The best place to get CCleaner is from its Piriform.com website. Use the links on the right that will take you to the download page and follow the instructions to download the free version. You can buy versions of CCleaner, but there is no need for those who just want to clean your computer.
CCleaner Running
Once downloaded CCleaner, simply click on the link in the download folder and run it. It will be installed and ready in a few minutes. Once installed, I have chosen to put a shortcut on the desktop for easy access. Now open CCleaner and you should see a simple open window.
Press the button to scan and it will take a few minutes to scan your computer. Once done the analysis, hit Run Cleaner and you’re done! It will take several minutes to clean the PC. If there is something you do not want to clean, such as browsing history or cookies, you can check and uncheck those in the scroll bar.
Now that the computer is clean, select the registry, troubleshoot, and then fix the registry will be clean!
My experience with CCleaner
When I came across CCleaner, for the first time, it has cleaned over 4 GB of unnecessary files. It also solved almost 200 registry problems. (I know, my computer had not been cleaned in a long time!) It took about 20 minutes, total execution time and it was very simple and easy to follow.
CCleaner I would suggest to anyone, but especially those with computers that are a few years old. I did it to speed up my team a bit, “but it may not be obvious to everyone. I’m happy to know that my team has 4 concerts plus space to fill with other stuff.
CCleaner works on Windows XP, Vista and 7. It also works on Mac and is available in the App Store.
Is CCleaner the Best Free Registry Cleaner?
I leave this to you and comments section, but in my opinion, CCleaner is one of the best, if not the best free registry cleaner. It is very simple and easy to use. Also “to download for free and has many functions besides cleaning the computer and registry.
Windows 10 Creators Update is the new Windows 10 update that will reach all users of this system on April 11. However, as we have said this week, Microsoft has already published the image of the RTM version, the final version, so that all users who want to install it prematurely (and, incidentally, help to find any possible error that may Be) can do it.
As we have said, Microsoft already allows downloading to all users the ISO images of Windows 10 Creators Update RTM, a highly anticipated update that will undoubtedly show us a Windows 10 already very mature and ready to happen to Windows 7, who Less than 3 years of life.
These options are fine for updating our system easily and without formatting, however, we are not used to performing a clean installation of Windows 10. To do this, ideally, create a DVD or bootable USB memory that allows us to install from scratch This operating system on any computer.
Both to create an installation DVD, and to create a USB stick to install Windows 10 Creators Update, we will use the Microsoft Windows USB / DVD Download Tool.
Create a DVD or USB installation to install Windows 10 Creators Update from scratch
For this, the first thing we have to do, if we have not already done it, is to download the ISO of Windows 10 Creators Update. We explain how to do it in the following article.
Once we have the ISO downloaded, we can continue with the process. To create our USB installation of this Windows 10, the first thing to do is to download the Windows USB / DVD Download Tool from the Microsoft website.
Once downloaded we install it on our computer and run it to see a window like the following one.
In this window, we must select the ISO image that we want to record to our USB memory. Click on “Browse” and look for the image of Windows 10 that we downloaded in the previous step to create the bootable USB memory.
Click “Next” and we will see a new window where we will be asked the type of installation media that we want to create or “USB Device”, the option that interests us to create our USB bootable Windows 10, or DVD, to record the ISO Directly to a DVD.
The program will automatically detect the USB memories connected to the computer and will allow us to choose in which we want to install it.
We will click on “Begin copying” and it will show us a message where it will inform us that all data will be erased from the USB memory in order to create the installation unit.
We confirm the deletion of the data and begin the process of creating our USB memory to install Windows 10 Creators Update.
The process will take several minutes so we will wait for it to finish. Once finished, we will see a window like the following one.
We can now extract our USB and use it to boot your computer and install Windows 10 Creators Update on it. The installation process is the same as the other versions of Windows 10, except the initial setup wizard.